SmartFind.me
Kullanım Kılavuzu
Usage Guide
Adım 1: Satın Alma ve Kayıt
Step 1: Purchase and Registration
İhtiyacınıza uygun bir paket satın alın. Paket, bir barkodlu parça, eğitim kataloğu ve bir şifre içerir. smartfind.me sitesinde e-posta ile kayıt olun ve kullanıcı panelinize erişin.
Purchase a package tailored to your needs. The package includes a QR-coded item, an instructional catalog, and a password. Register with your email on smartfind.me and assets your user panel.
Adım 2: Paket Ekleme
Step 2: Adding a Package
Kontrol panelinde, "Yeni Paket Ekle" düğmesine basarak barkod numarasını ve şifreyi girin ve paketi panele ekleyin.
In the dashboard, click the "Add New Package" button, enter the QR code number and password to add the package to your panel.


Adım 3: Paketin Panelde Görünmesi
Step 3: Package Appears in Panel
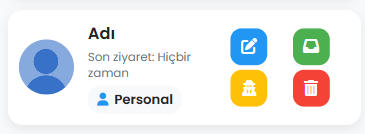
Barkod ve şifreyi başarıyla girdikten sonra, yeni paketiniz kontrol panelinizde bu şekilde görünecektir. Artık paketinizi yönetebilirsiniz.
After successfully entering the barcode and password, your new package will appear in your dashboard like this. You can now manage your package.
Adım 4: Paketi Yönetme
Step 4: Managing the Package
Her paket, yandaki dört düğme ile yönetilir. Her düğmenin işlevi aşağıda açıklanmıştır:
Each package is managed with the four buttons on the side. The function of each button is explained below:
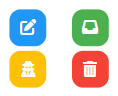
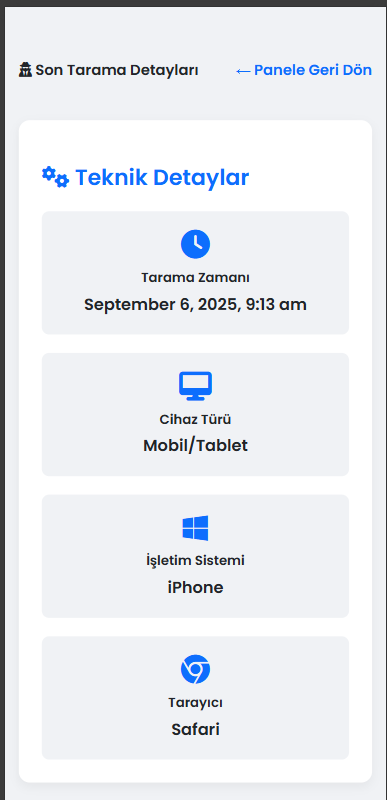
Adım 4-1: Düzenle (Mavi Düğme)
Step 4-1: Edit (Blue Button)
Mavi düzenleme düğmesine basarak paketinizin profil resmini, temasını ve diğer detaylarını (örneğin, çanta türü, evcil hayvanın adı) güncelleyebilirsiniz.
By clicking the blue edit button, you can update your package's profile picture, theme, and other details (e.g., bag type, pet's name).
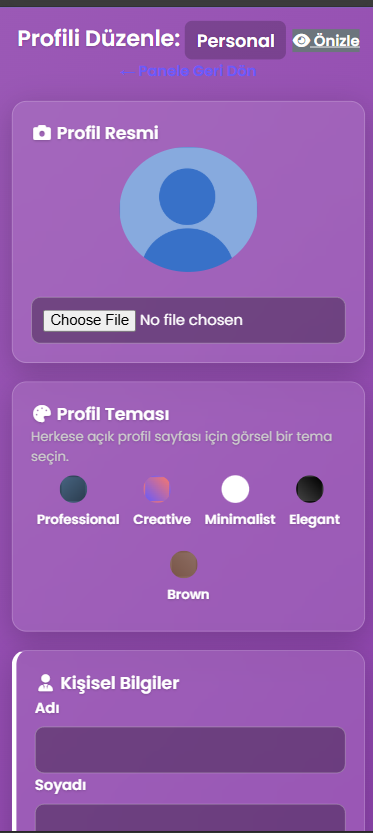
Adım 4-2: Gelen Kutusu (Yeşil Düğme)
Step 4-2: Inbox (Green Button)
Yeşil düğme, QR kodunuzu tarayan kişiler tarafından gönderilen uyarıları ve mesajları görmenizi sağlar. Buradan bulan kişinin iletişim bilgilerini görüntüleyebilirsiniz.
The green button allows you to see alerts and messages sent by people who have scanned your QR code. You can view the finder's contact information here.
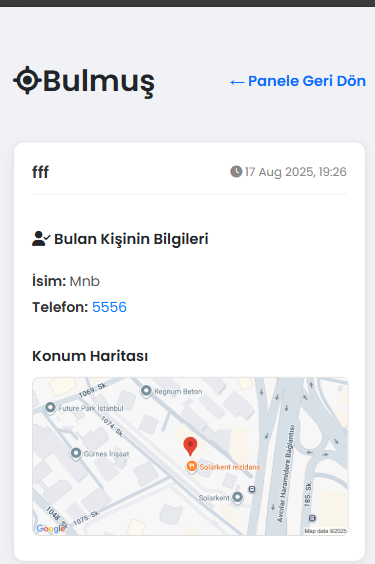
Adım 4-3: Kontrol Et (Sarı Düğme)
Step 4-3: Check (Yellow Button)
Sarı kontrol et düğmesi, QR kodunuzun en son ne zaman ve hangi cihaz tarafından tarandığının detaylarını (konum, zaman, IP adresi) gösterir.
The yellow check button shows the details of the last scan of your QR code (location, time, IP address).
Adım 4-4: Sil (Kırmızı Düğme)
Step 4-4: Delete (Red Button)
Kırmızı silme düğmesi, artık kullanmadığınız bir paketi kontrol panelinizden kalıcı olarak kaldırmanızı sağlar.
The red delete button allows you to permanently remove a package you no longer use from your dashboard.
Adım 5: QR Kodun Taranması
Step 5: QR Code Scanning by Others
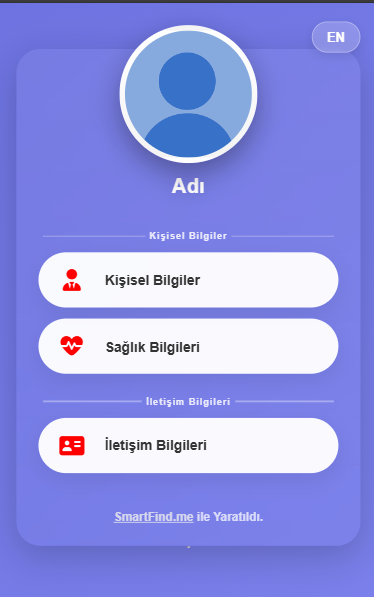
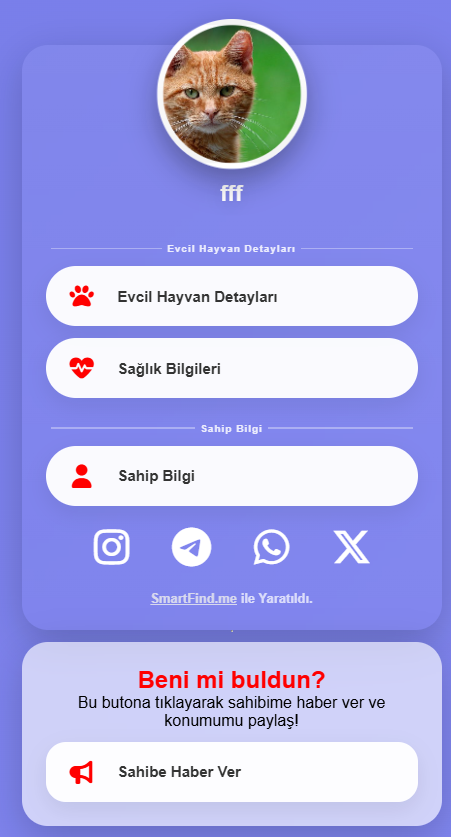
Bir başkası QR kodunuzu taradığında, tanımladığınız bilgiler (isim, telefon, adres vb.) görüntülenir. "Sahibine Bildir" tuşuna basıldığında, bulan kişinin detayları (isim, telefon, konum) size ve e-postanıza gönderilir.
When someone scans your QR code, the information you defined (name, phone, address, etc.) is displayed. When they click "Alert Owner", the finder's details (name, phone, location) are sent to you and your email.